GuidesArea Conquest & achievements
Area Conquest & achievements
One window, two systems. Nine regions with a completion bar each, where every ten per cent pays out and the top of a bar is worth a top-grade Zard and a five-socket relic. And a second half that ticks over on its own as you level — which is where a free Elite 1 set and most of a Mayan stockpile come from.
J
opens the window
9
regions to conquer
965
entries in total
480
that pay something
The window
What is behind the J key
Area Conquest is the game's achievement board, and it is split into two halves that behave quite differently. Most people only ever read the first one.
Area Conquest · 277 entries
Nine regions — Forest of Beasts, Etherain Sewer, Frozen Palace, Valley of the Dragonkin, Aiort Graveyard, Helron’s Castle, Green Earth, Shelter for Spirits and the Boreas Mountains. Each has its own bar and its own ten-step reward ladder, and this is the half you go and do deliberately.
Accomplishment · 688 entries
Five lists that tick over as you play — Achievement, Chaos Zone, Fame, Battle Zone and Event. There is no completion bar here; entries simply unlock as you meet them. The level milestones live in this half, and they are the single most valuable thing in the window.
- 1
Press J
That is the default binding for the Area Conquest window; J toggles it. It can be rebound in the key settings like anything else. - 2
Pick a region
The tabs filter to All, In Progress or Complete, which is the fastest way to see what is left in a region you have half finished. - 3
Do the tasks
They tick over on their own as you play — nothing needs accepting first. A task you have met shows as ready. - 4
Claim each one
Rewards are not automatic. Claiming a task is what adds its share to the region bar, so an unclaimed pile of finished tasks is a bar that has stopped moving.
How the bar works
Twenty-one tasks, adding up to exactly one hundred per cent
Each region's ordinary tasks are worth a fixed slice of that region, and the slices are not equal — clearing the main mission is worth eight per cent, collecting ten trophies is worth two.

Collect an item
Treasure keys, maps, monster trophies — usually ten of something the region's mobs drop.

Kill a named monster
The region's bosses, its lucky monsters and its captains, each its own task.

Clear the main mission
The region's headline instance. Worth one of the larger slices of the bar.

Clear a sub mission
Each of the region's smaller instances counts separately.

Finish quests in the region
A count of completed quests rather than any particular one.

Clear the Cursed Tower
Where the region has a tower floor attached to it.

Gather
Collection nodes out in the field, not monster drops.

Reach a completion mark
The ten milestone entries. These are what actually pay items.
Claim all of them — twenty to twenty-two depending on the region — and it reads one hundred per cent. Ten further entries sit alongside them, one at each ten per cent mark, and those are the ones that pay an item rather than a slice of the bar.
The payouts
What each ten per cent is worth
The Forest of Beasts ladder in full — the first and smallest of the nine. Every other region runs the same ten steps with bigger numbers and better versions of the same items.
| Mark | Reward | Heim |
|---|---|---|
| 10% | Rejuvenation Potion ×10 | 5,500 |
| 20% | Berserk, Awakening and Sprint Potion — ×10 of each | 8,500 |
| 30% | Extra Stone | 13,900 |
| 40% | Heim Coin ×10 | 21,700 |
| 50% | Photon ×20 | 31,900 |
| 60% | Ring of Beasts and Necklace of Beasts, both | 44,500 |
| 70% | A High-grade Zard box | 59,500 |
| 80% | Stat Point Up | 76,900 |
| 90% | Holy Book of Hermetism — 4 or 5 sockets | 96,700 |
| 100% | Slime King, a pet | 118,900 |
Region by region
How the same ten steps escalate
The shape never changes — enchant material at fifty, an accessory at sixty, a jewel at seventy, sockets at ninety, the payoff at a hundred. What changes is which version of each you get.
| Region | 50% — enchanting | 60% | 70% — jewels | 100% |
|---|---|---|---|---|
| Forest of Beasts | Photon ×20 | Ring + Necklace of Beasts | High-grade Zard box | Slime King |
| Etherain Sewer | Photon ×40 | O'Neil's Ring + Necklace | Highest-grade Zard box | Contaminated Spider |
| Frozen Palace | Photon ×60 | Snowflower Ring + Necklace | Highest-grade Zard box | Ice Queen |
| Valley of the Dragonkin | Packing Photon ×20 | Ring + Necklace of Flames | Highest-grade ×2 | Golden Cherry Dragon |
| Aiort Graveyard | Packing Photon ×40 | Ring + Necklace of the Altar | Highest-grade ×2 | Fimbulbert |
| Helron's Castle | Packing Photon ×60 | Cursed Tower Seal Set | Highest-grade ×3 | Tainted Mutant |
| Green Earth | Trans Photon ×10 | Supply Box + 3 Blessings | Synthesis ×3 + 3 stones | 111,838,800 heim |
| Shelter for Spirits | Trans Photon ×20 | Supply Box + 6 Blessings | Synthesis ×4 + 3 stones | 111,838,800 heim |
| Boreas Mountains | Extra Photon ×10 | Supply Box + 9 Blessings | Synthesis ×4 + 3 stones | 223,677,600 heim |
The reason to do it
The top of a bar is worth more than the whole of the rest
The last three marks are where Area Conquest stops being pocket money. Two of them are the only reliable source in the game for what they hand over.
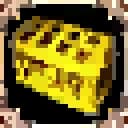
At 70%
A top-grade Zard
A box holding one random jewel, and the count climbs with the region. The Forest of Beasts pays one High grade box; the next five pay one to three Highest; the last three pay three or four Highest-grade Synthesis boxes — jewels carrying two options at once — plus three extraction stones to move them.
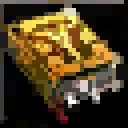
At 90%
Four or five sockets
The Holy Book of Hermetism, rolled with four or five sockets — every region, guaranteed. On a normal drop a five-socket item is one in a thousand, so this is the shortcut to somewhere to put those jewels. From the Dragonkin on it brings awakening crystals with it.
At 100%
A pet, or a fortune
The first six regions each finish on a pet — Slime King, Contaminated Spider, Golden Cherry Dragon, Fimbulbert and the rest. Green Earth, the Shelter and the Boreas Mountains finish on heim instead: 111 million each for the first two and 223 million for the last.
Taken together that is the argument for finishing a region rather than grazing it: seventy per cent for the jewel, ninety for somewhere to socket it, a hundred for a pet or a bank balance. And the fifty per cent mark quietly hands out enchant material every time — twenty Photons in the Forest, and ten Extra Photons in the Boreas Mountains, which is the only place in the game that gives you the +13-and-up material in bulk.
The other half
The level milestones pay better than anything you go and do
Behind the Achievement tab is a row for every ten levels, and from sixty upward they are not decorative. They hand over a complete Elite 1 weapon and armour set, an Elite 1.5 weapon, and — quietly, at every milestone — a parcel of the crafting material the whole Elite ladder runs on.

Black Wing
Level 100Your class's own wings — and not just for looks: they add 30 Intellect, 1,000 maximum HP, 10 skill damage and a little movement speed. Eight versions, one per class.

Elite 1 weapon
Level 110Both of your class's E-1 weapon entries at once. The first rung of the ladder you never replace.

Elite 1 armour
Levels 120 & 130Four pieces at 120, the other four at 130. A complete eight-piece Elite 1 set for nothing.

Mayan material
Levels 60 – 170A parcel at every milestone from 60, and Lv.3 jewels at every single level from 161 to 170.
| Level | What lands in your bag | |
|---|---|---|
| 60 · 70 · 80 · 90 | 4 × Lv.2 Mayan Jewel, 4 × Lv.2 Mayan Metal, 2 × Lv.3 Jewel, 2 × Lv.3 Metal | Every ten levels |
| 100 | Your class’s Black Wing — plus the same Mayan parcel | Wings |
| 110 | Your class’s Elite 1 weapon, both entries — plus the same Mayan parcel | Free E-1 |
| 120 | Four Elite 1 armour pieces — protector, gloves, belt, shirt | Free E-1 |
| 130 | The other four — chest, helmet, pants, boots | Free E-1 |
| 140 | Your class’s Elite 1.5 weapon, both entries, and 5 × Lv.2 Mayan Jewel | Free E-1.5 |
| 150 | 5 × Lv.3 Mayan Jewel and a Kalbus’s Cut-off Arm | Mayans |
| 155 · 160 | 5 × Lv.3 Mayan Jewel | Mayans |
| 161 – 170 | 2 × Lv.3 Mayan Jewel, at every single level | Mayans |
The gear
A free Elite 1 set at 110 – 130
It is worth being blunt about this, because the crafting guide is not the whole story: reach level 130 and the game gives you a complete Elite 1 set and its weapon, free, with no materials and no failure chance. It arrives plain — +0 and unsocketed — exactly as a crafted one would.
What you buy by crafting is time. An E-1 piece is wearable at 68 and the set completes at 73; waiting for the milestones means going from 73 to 130 in whatever you can scavenge. Sixty levels is a long time to be undergeared, and Elite 1 is the tier every later tier is built out of — so the piece you make at 68 is the one you are still wearing at 146.
The material
The largest Mayan source in the game
Add the milestones up and a character who reaches 170 has been handed 29 Lv.2 Mayan Jewels, 24 Lv.2 Metals, 47 Lv.3 Jewels and 12 Lv.3 Metals — for levelling and nothing else.
Lv.3 is the rung the Elite recipes actually ask for, and it costs about twenty-five online points and two combines to make any other way. The jewels come far faster than the metals, so metal stays the thing you plan around.
The rest of the board
Four more lists, and what they are actually worth
The Accomplishment half has five tabs. One of them is the level ladder above; these are the other four.

Achievement
Besides the levels, this tab holds a potion chain that pays you in potions — drink ten Lv.1 and it gives ten Lv.2, and it ladders all the way to 255 Recovery Potion Lv.6 for drinking a thousand Lv.5. It also holds the Equipment Grade chain, where only the 15,000, 20,000 and 30,000 marks pay anything, and they pay titles: Psychic, Transcendent, The Absolute.

World Ranking
Sixteen entries counting the firecrackers a world-ranking win hands you. They pay in heim and they do not mess about: 50 million for the second, rising to 400 million for the fiftieth, with titles at one, ten, thirty and fifty — Rank 1, Champion, World Champion, Special One.

Battle Zone
The campaign, step by step. Each stage of a region’s story pays 100,000 heim and a Certificate of the Liberation Army; finishing the region pays 500,000 and a Qualification. In the last three regions those become a million heim and an Ardor Expedition certificate, with five million experience for the region itself. The Nightmare trials pay titles.

Chaos Zone & Fame
Battlefield wins pay a million heim per hundred, up to four million at four hundred, then a title at five hundred — on each of Zapir, Frost and the Tomb of Desire separately. The arena chain pays potions, invitations and a class skin box. Fame is titles almost end to end, and half of its entries pay nothing at all.
A fifth tab, Event, holds twenty-two entries keyed on seasonal tokens. They are always listed and they fill in when an event that hands out those tokens is running.
Next
Elite 1
The set the milestones hand you at 130 — and how to be wearing it at 73 instead.
Related
Zard jewels
What to do with the jewel at 70% — and why where you put it matters more than which one it is.
Standings
Area Conquest ranking
How far through the nine regions everyone is, read live from the game.