GuidesZard jewels
Zard jewels
Zards are the gems that go into sockets. They are also the most misunderstood system in the game, because a Zard does not give you a stat — it gives you points, and the points from every socket you own are added together before anything is worked out. Spreading them thin is close to wasting them.
48
jewels per grade
4
grades, Low to Highest
5
sockets on the best items
50P
the top bonus threshold
The rule that matters
Zards give points, and points stack across your whole character
Everything else on this page follows from this one mechanic, so it goes first.
Every Zard is worth a small number of points in one option — between 1 and 9, decided by its grade. Those points are not applied to the item you slotted it into. They go into a running total for that option across every piece you are wearing, and the total is then looked up against a ladder to produce the actual bonus.
The ladder is not proportional. It steps at 1, 10, 20, 30, 40 and 50 points, taking the highest step your total reaches. Sun Zards are the clearest example: one point is worth 80 maximum HP, but fifty points is worth 2,400 — thirty times the bonus for fifty times the points.
Which means: six Sun Zards in six different pieces are worth far more than six different Zards spread around. Pick two or three options and commit to them.
| Points | Sun Zard | Onslaught | Knowledge |
|---|---|---|---|
| 1P | +80 HP | +4 attack | +1% exp |
| 10P | +150 HP | +8 attack | +2% exp |
| 20P | +300 HP | +16 attack | +4% exp |
| 30P | +600 HP | +32 attack | +6% exp |
| 40P | +1,200 HP | +64 attack | +8% exp |
| 50P | +2,400 HP | +128 attack | +10% exp |
Grades
Four grades, and what each one rolls
The grade sets the band a Zard's point value is drawn from. Within the band the roll is weighted heavily toward the bottom.
Low
1 – 3
points
Medium
3 – 5
points
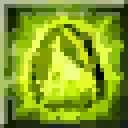
High
5 – 7
points
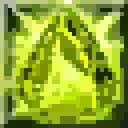
Highest
7 – 9
points
The four Sun Zards above are the same jewel at each grade. The art brightens a little as the grade climbs, but the difference is subtle enough that the tooltip is the only reliable way to tell them apart.
Inside a band the roll is 60% / 30% / 10% for the bottom, middle and top value. A Highest-grade Zard is therefore usually a 7, sometimes an 8, and rarely the 9.
Note the overlap: the bands share a value at each boundary, so the worst Medium roll is worth exactly the same as the best Low roll. A grade is worth chasing for the floor it guarantees, not the ceiling it promises.
Slotting
You cannot fill an item with Highest jewels
There is a hard cap per item on how many Zards of each grade it will hold, and it is the opposite of what you would guess.
| Grade | Most you can fit in one item |
|---|---|
| Low | 5 |
| Medium | 3 |
| High | 2 |
| Highest | 1 |
The best single item you can build is therefore one Highest, two High and two Medium: 9 + 7 + 7 + 5 + 5, or 33 points if all five carry the same option. That is one item three quarters of the way to the top step on its own.
Because the cap is per item and the points are per character, the way to a 50P bonus is to put a Highest Zard of the same option in several different pieces rather than trying to load one.
Sockets only exist on weapons and armour, five at the very most, and a jewel can be taken back out later — extraction is one of the things the Enhancement NPC does.
Where sockets come from
Sockets are rolled when the item drops
You do not add sockets to a finished piece. The item either dropped with them or it did not, which makes a multi-socket Elite drop a genuinely rare thing.
| Elite tier | Chance the drop has sockets | Sockets, if it does |
|---|---|---|
| E-1 | 5% | 95% one · 4.5% two · 0.5% three or more |
| E-1.5 | Always | 95% one · 4.5% two · 0.5% three or more |
| E-2 | Always | 95% one · 4.5% two · 0.5% three or more |
| E-2.5 | Always | 95% one · 4.5% two · 0.5% three or more |
| E-3 | 5% | 95% one · 4.5% two · 0.5% three or more |
| E-3.5 | 5% | 95% one · 4.5% two · 0.5% three or more |
| E-4 | 5% | 95% one · 4.5% two · 0.5% three or more |
Composing
Three jewels into one, one grade up
The only way to make a higher-grade Zard. Done at the Enhancement NPC — the same one that handles enchanting, awakening and evolution.
- 1
Collect three Zards of the same grade
Three separate jewels, one per slot in the window. They do not have to be the same kind — the result takes its option from the jewels you put in. - 2
Add a condiment if you want better odds
Optional, and the only thing that moves the number. The Faint condiment adds 10 percentage points and the Glittering one adds 20. - 3
Press it and hope
On a success you get one Zard of the next grade up. On a failure the three jewels are gone and the odds on your next attempt are exactly the same as they were on this one.
| Composing | Base chance | With Faint | With Glittering |
|---|---|---|---|
| Low → Medium | 50% | 60% | 70% |
| Medium → High | 30% | 40% | 50% |
| High → Highest | 10% | 20% | 30% |

Faint Zard Synthesizing Condiment
+10%Consumed by the attempt whether it succeeds or fails.

Glittering Zard Synthesizing Condiment
+20%Worth saving for High → Highest, where it triples the base chance.
Or skip the ladder entirely
Every Area Conquest region pays jewel boxes at seventy per cent, and they are not low-grade ones: the Forest of Beasts gives a single High-grade Zard, the next five give one to three Highest-grade, and Green Earth, Shelter for Spirits and the Boreas Mountains give three or four Highest-grade Synthesis jewels — each carrying two options at once — plus three extraction stones to move them with. Given that composing your own Highest costs twenty-seven High-grade jewels on average, conquering a region is by some distance the cheapest route to one. The ninety per cent mark then hands you a relic with four or five sockets to put them in.
The catalogue
Twenty-two options, plus the fusions
Each grade has the same twenty-two single-option jewels and twenty-six Synthesis jewels that carry two options at once.

Sun

Full Moon

Onslaught

Protection

Falcon

Resolution

Wolf

Cheetah

Spell

Knowledge

Plenty

Hard Diamond

Sharp Ruby

Hard Ruby

Synthesis
| Jewel | What it adds points to |
|---|---|
| Sun Zard | Maximum HP |
| Full Moon Zard | Maximum MP / SP |
| Onslaught Zard | Physical attack power |
| Protection Zard | Physical defence |
| Falcon Zard | Critical chance |
| Resolution Zard | Block success rate |
| Wolf Zard | Attack speed |
| Cheetah Zard | Movement speed |
| Spell Zard | Skill damage |
| Knowledge Zard | Experience gained |
| Plenty Zard | Heim gained |
| Hard Diamond Zard | Resistance to every element |
| Sharp Ruby Zard | Fire attack power |
| Sharp Sapphire Zard | Water attack power |
| Sharp Topaz Zard | Earth attack power |
| Sharp Emerald Zard | Wind attack power |
| Sharp Onyx Zard | Dark attack power |
| Hard Ruby Zard | Fire resistance |
| Hard Sapphire Zard | Water resistance |
| Hard Topaz Zard | Earth resistance |
| Hard Emerald Zard | Wind resistance |
| Hard Onyx Zard | Dark resistance |
Bear in mind that the movement and attack speed the Wolf and Cheetah jewels give you counts against the same server-side ceiling everything else does; past the cap, more speed does nothing at all.